¡Bienvenido al emocionante mundo de las Finanzas Descentralizadas (DeFi)! En este artículo te guiaremos para que des los primeros pasos en DeFi de modo sencillo. Si no tienes muy claro que es DeFi te recomendamos que leas nuestro artículo: ¿Qué es DeFi? Una guía completa sobre las finanzas descentralizadas
Uno de los problemas que surgen al empezar en DEFI es que tienes que tomar muchísimas decisiones, como la investigación, la evaluación del riesgo o la selección de plataformas y protocolos, y muchas veces es difícil distinguir qué características son importantes, te puedes tirar horas leyendo y no llevando a cabo ninguna acción, para evitar la parálisis por análisis en esta guía vamos a tomar estas decisiones por ti.
Dentro de las muchas opciones de DEFI que existen os proponemos las que consideramos más fáciles y las que garantizan la máxima seguridad. A lo largo de la guía os iremos explicando el por qué de cada una. Hay muchas opciones, por lo que si tienes convencimiento de que hay otra opción mejor, no no hagas caso y guíate por tu conocimiento e instinto, ¡lo importante es que pases a la acción!
La guía está escrita a modo divulgativo y en ningún momento representa una recomendación de inversión. La inversión en criptoactivos no está regulada, puede no ser adecuada para inversores minoristas y perderse la totalidad del importe invertido. Es importante leer y comprender los riesgos de esta inversión que se explican detalladamente en esta ubicación.
En este manual vamos a utilizar la red Polygon. Porque además de ser una de las redes con mayor capitalización, entre otras cosas, la red Polygon tiene características similares a Ethereum, que es la reina de las redes para DEFI, pero con transacciones rápidas y tarifas más bajas, lo que la convierte en una opción muy buena para empezar a realizar operaciones DeFi con poco capital y sin pagar excesivas comisiones.
Para acceder a DeFi, necesitarás una billetera digital (wallet) compatible con la red blockchain que elegiste. Las billeteras te permiten almacenar y gestionar tus criptomonedas de manera segura. Algunas opciones populares para redes como Polygon incluyen MetaMask, Trust Wallet y Ledger.
Estos wallets suelen ser de auto custodia por lo que en general te generan una “seed phrase” (frases de recuperación): son una lista de palabras esenciales para restaurar tu billetera en caso de que pierdas acceso a tu dispositivo o necesites reinstalar el wallet. Anota las palabras en el orden correcto y guárdalas en un lugar seguro y a poder ser offline. Si pierdes la frase probablemente pierdas el acceso a los fondos.
Es un cambio brutal de paradigma con las finanzas tradicionales. Entendemos que puede dar un poco de miedo pero es una consecuencia obligatoria para que los fondos sean totalmente tuyos, del mismo modo que nadie puede recuperarlos si lo pierdes nadie podrá bloquearlos si no le das permiso.
En esta guía vamos a usar MetaMask que es una wallet popular y ampliamente utilizada que te permite interactuar con la red Base y otros protocolos DeFi. Aquí te explicaremos cómo instalar y configurar MetaMask:
¡Listo! Ahora tienes MetaMask instalado y configurado. Puedes explorar las características de MetaMask y personalizar tu experiencia, cómo agregar cuentas adicionales, cambiar las redes a las que te conectas y ajustar la configuración de privacidad y seguridad según tus preferencias.
Recuerda que MetaMask es una billetera en línea, por lo que debes tomar precauciones adicionales para proteger tu información y asegurarte de que tu dispositivo esté libre de malware o software malicioso.
Una vez que hayas configurado MetaMask, podrás conectarte a la red Polygon siguiendo los pasos adicionales que te explicamos a continuación.
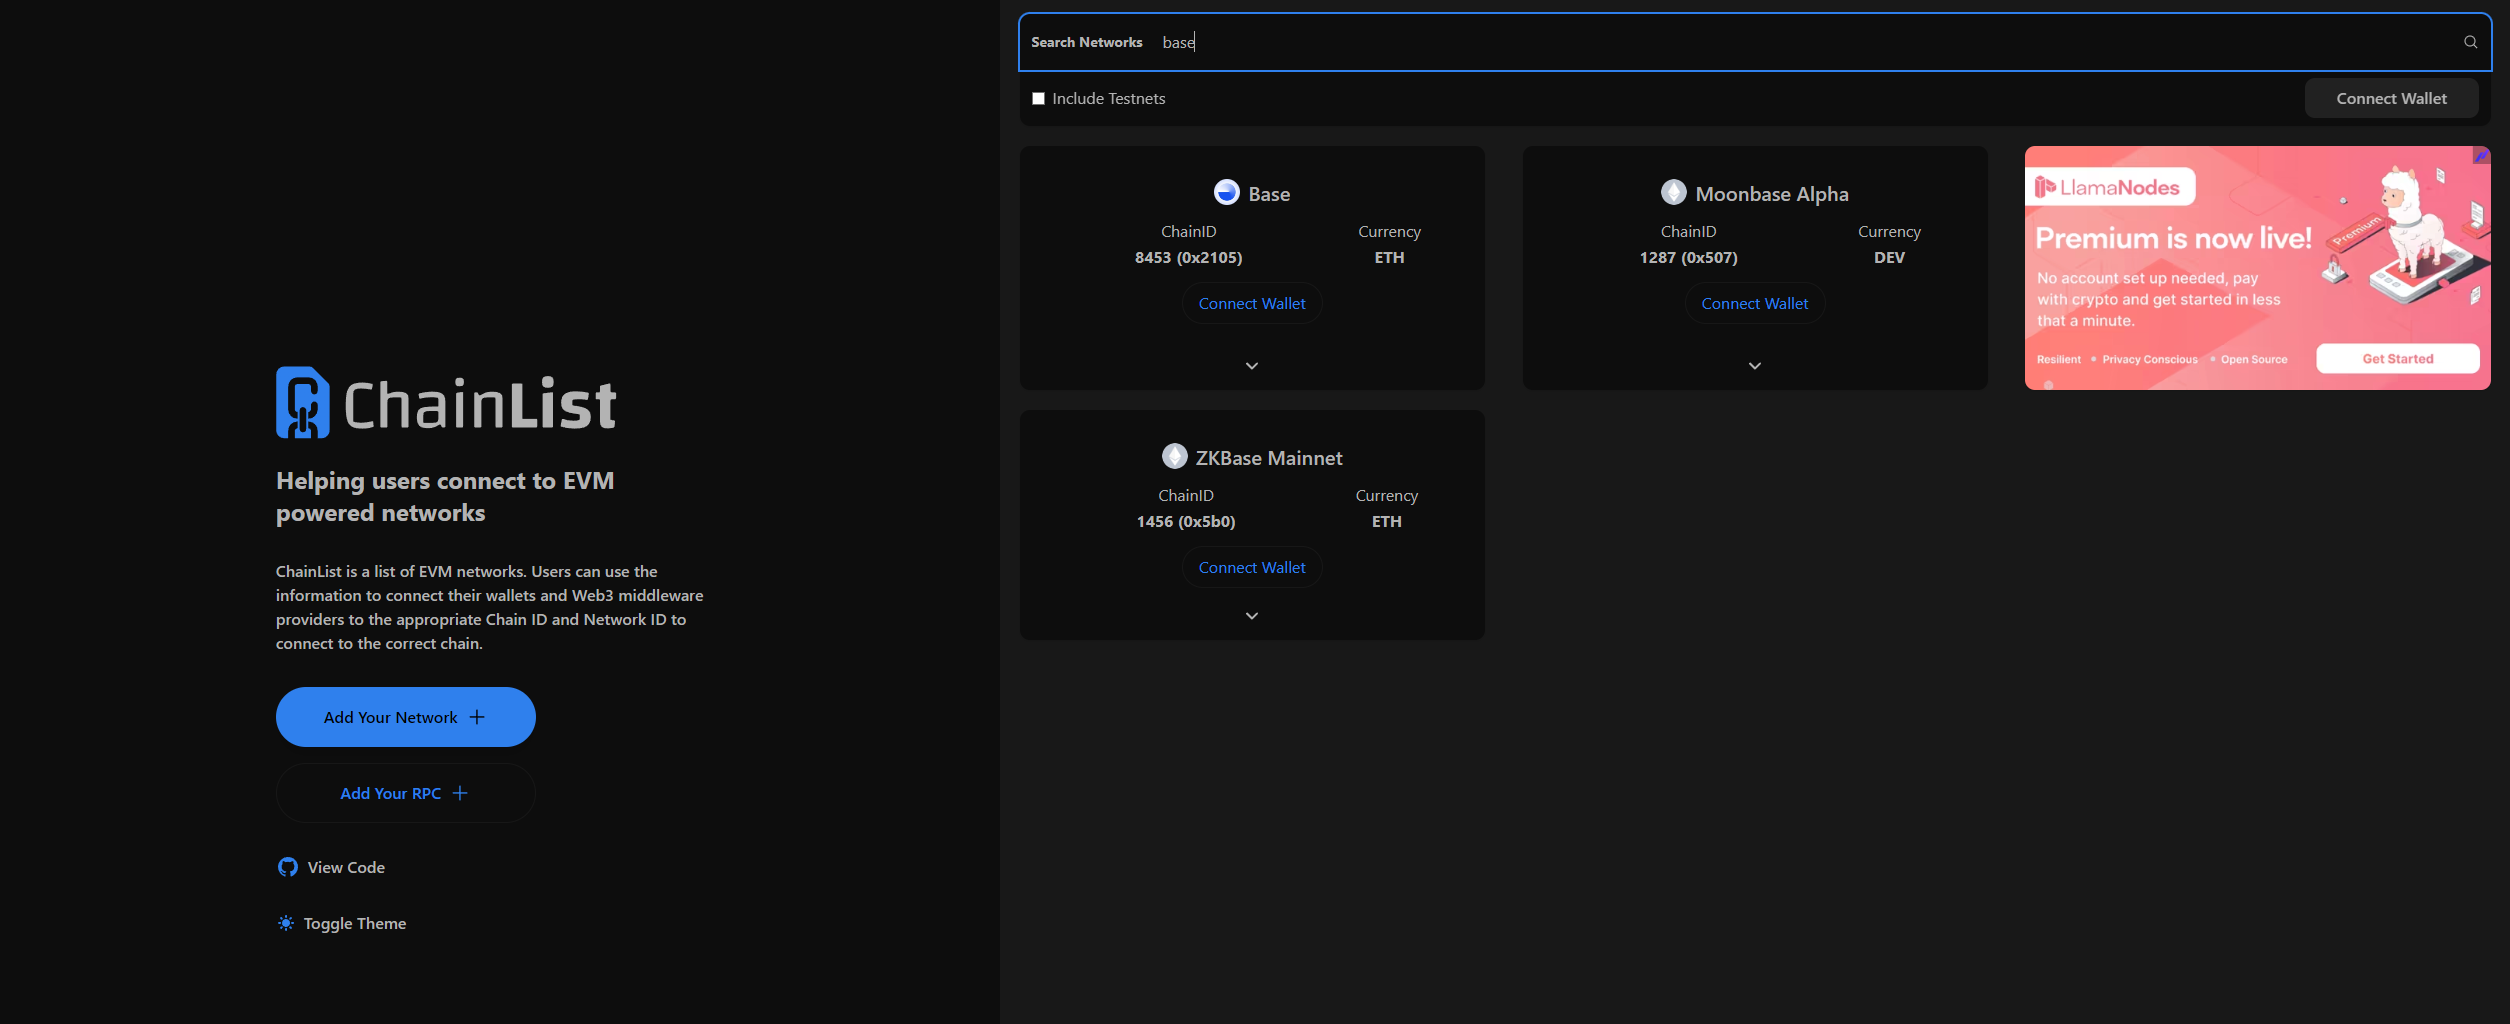
Existen varias formas de añadir una red a MetaMask, pero aquí te contamos la que nos resulta más sencilla y segura.
Desgraciadamente en el ecosistema crypto hay muchas estafas por lo que Metamask te enseñará varios mensajes de alerta, en esta ocasión si estás siguiendo nuestros pasos no tienes por qué tener problema. Pero cuando realices este paso por tu cuenta te recomendamos que seas cuidadoso y no añadas redes sin hacer comprobaciones.

¡Felicidades! Ya has completado el primer paso de la guía y ya tienes instalada tu wallet y has agregado con éxito la red Base a MetaMask.
Ahora puedes utilizar MetaMask para interactuar con los protocolos DeFi y realizar operaciones en la red Base.
Asegúrate de tener fondos en la red Base (como ETH) para poder empezar a operar. ¡En el siguiente paso te enseñamos cómo hacerlo!